FINISHED! argh what a relief, although I really enjoyed all this crap towards the end when it got busy. I enjoyed seeing the film come together slowly into a finished piece. We had quite a few problems today in terms of sound and all that. I was meant to meet the sound guy at 12:30 in college to get the final sound cut from him but when I got into college I saw what he had and there were still a few adjustments for him to make. While he was doing this I went upstairs at about 1:30PM so that me and Luke could encode the film out and burn it to a disk however I left one of the files we needed at home on my hard drive. I quickly drove home and picked it up and by the time i got back in it was about 2:15PM....because I hadnt slept the night before I got very worried that the 4PM deadline was drawing near and we still had not burnt our film onto a disk and the sound wasnt ready for the final cut! and then to make problems worse, by the time the film was finished encoded it was about 3:50PM and the college computers wouldnt burn it onto my disk for some reason. In the end we had to burn it on Ian's laptop and finally handed in our film slightly later than planned.
I enjoyed working on this film and ofcourse there were some times better than others. If we had more help from some of the other group members towards the end of the project myself and Luke would not have had to work through the night days on end trying to get this done. But to be fair many of the things we needed at this stage were areas which they did not have much experience in.
Over the next few weeks me and Luke plan to polish the film for the degree show. Also I am going to light the truck scene from scratch that Rey gave me so that it can make its way back into the film (we had to cut it out for the submission because it didnt look good)
Friday, 13 June 2008
Almost there
it's nearly 8AM on the day of the hand in and me and Luke sill have a bit left to finish off. While he is finishing off photo-shopping the background plates I am finishing off the lighting and rendering f or the remaining scenes. All is looking positive for us to hit the deadline but I am just concerned about the folders we are meant to be handing in - to be honest I really havent had my mind set on finishing those instead I wanted to finish the film but I will be doing those while these shots are rendering.
EDIT: it's now 09:36AM and Luke has just fallen asleep on the sofa - what an arse. While hes asleep I will composite the shots in premiere and cut them together. I have arranged to meet James Murray (the soundman) in college about about 12PM to get the soundtrack off him. He has been working on it since tuesday which was his deadline
EDIT: it's now 09:36AM and Luke has just fallen asleep on the sofa - what an arse. While hes asleep I will composite the shots in premiere and cut them together. I have arranged to meet James Murray (the soundman) in college about about 12PM to get the soundtrack off him. He has been working on it since tuesday which was his deadline
Thursday, 12 June 2008
Renders
ONE DAY LEFT - and today will be a long one. These are the shots I have rendered so far - I feel that my choice of using background plates and rendering the character on a separate layer has really helped us out in terms of render times. All the shots below were rendered in the Maya Software renderer only


Wednesday, 11 June 2008
Light rigs
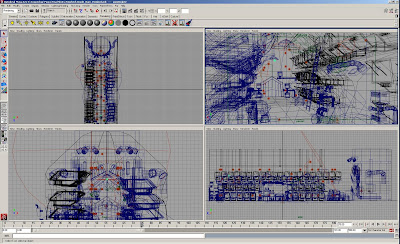
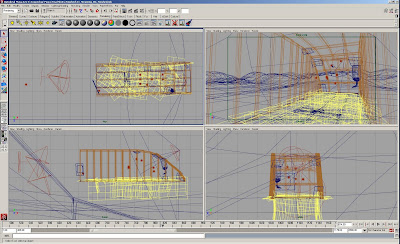
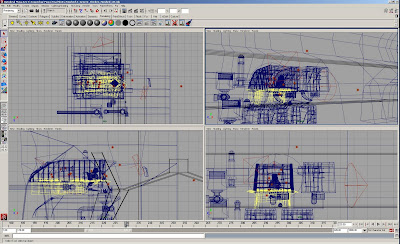
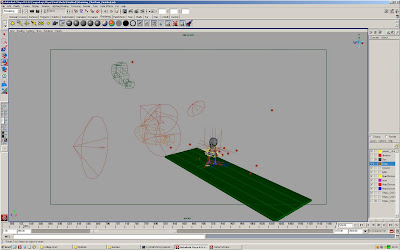
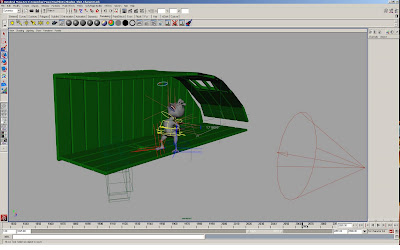
I'm currently working on the lighting setups for some of these remaining scenes. In very few cases I have been able to copy a lighting rig from one scene to another but even when i did this i obviously had to make a few adjustments on the backlighting and so on...
These are a few screen shots of some of the lighting rigs I have created:
Interior of barn
Inside of coop
Generic chicken laying eggs
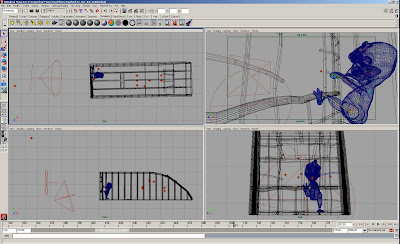
Pulling Bar
Main chicken lighting Rig
Eggcounter lighting
Hoover Shot

These are a few screen shots of some of the lighting rigs I have created:
Interior of barn

Inside of coop

Generic chicken laying eggs

Pulling Bar

Main chicken lighting Rig

Eggcounter lighting

Hoover Shot

Tuesday, 10 June 2008
Lighting and animating
There is still a bit of animation left and also I have to light many of the remaining shots! as a relief Luke will be doing the secondary on the remaining shots and he will also be working on photo-shopping the background plates I have rendered to tweak them. We asked Rey to finish off working on the exterior shot of the truck coming over the hill a couple of days ago - he also said he wanted to light it. I saw a few tests over the past few days and it wasnt looking too bad. The only problem was that he has made the intro scene a bit too creepy and horror like and didnt really suit the film anymore. However he done some very nice smoke on the truck but it really needs some more tweaking. Today he brought in a render he done of the sequence and unfortunately it wasnt looking to great and he admitted to it. After thinking about this with myself Luke and Rey I suggested to them that we take this shot out and think of a different way to introduce the film. They agreed with me because one of the only reasons we kept this shot in the film in the first place was that it looks nice but infact it has actually become the opposite. We will however work on this shot in the 2 weeks we have for the degree show and I will light the scene myself.
Anyway these are of the shots I have completed of the last few days:
Chicken flirt
and heres a render of it when I lit it:
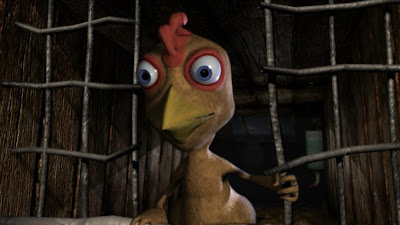
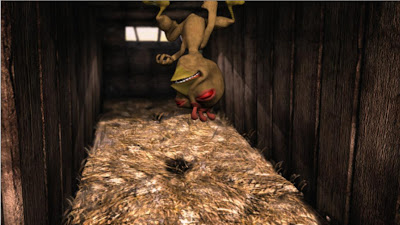
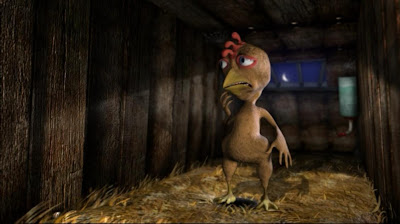
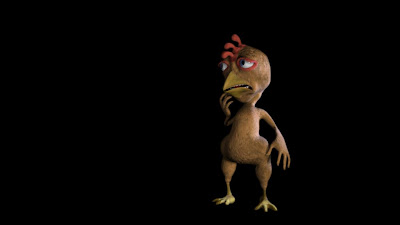
Scared Chicken
And here is a render after I lit the scene:
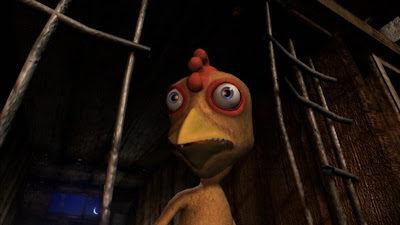
I really like how this came out, i tried to exaggerate the blue coming from the sky in the background to complement the orange light of the fire from the boiler. Also I placed the fire itself very close to the character and got it to physically emit light so now there is an orange glow to the scene and also the reflection of the fire in the chickens eyes.
Anyway these are of the shots I have completed of the last few days:
Chicken flirt
and heres a render of it when I lit it:

Scared Chicken
And here is a render after I lit the scene:

I really like how this came out, i tried to exaggerate the blue coming from the sky in the background to complement the orange light of the fire from the boiler. Also I placed the fire itself very close to the character and got it to physically emit light so now there is an orange glow to the scene and also the reflection of the fire in the chickens eyes.
Monday, 9 June 2008
Lighting
I only have one more shot to finish tweaking with the animation and then my sole priority will be lighting. I have already lit the majority of the scenes I just need to look at them one more time for continuity in the lighting in sequence - for example preventing one shot being much darker or lighter than the previous ones when they shouldn't. This is one of the shots I am looking at:
Gary has really let us down with the animation, we were relying on his help to finish the animation in time so we could give it to our sound guy in time. He Failed to do this and stuck me and Luke with a whole lot of extra work which has now slowed us down considerably.

Gary has really let us down with the animation, we were relying on his help to finish the animation in time so we could give it to our sound guy in time. He Failed to do this and stuck me and Luke with a whole lot of extra work which has now slowed us down considerably.
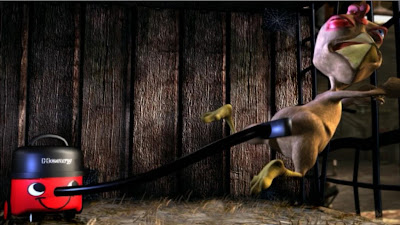
Compositing hoover shot
I have rendered out the sequence of the hoover shot that was animated by myself and Luke. I have been working on the compositing of the layers - I have decided to have one character pass and two background plates to give the look of the shot a bit more depth.
And this is the rough composite - The wood will need some colour adjustment and I think the character is casting too much shadow. I will come back to this shot once I've finished some other bits so I can come back to this with fresh eyes
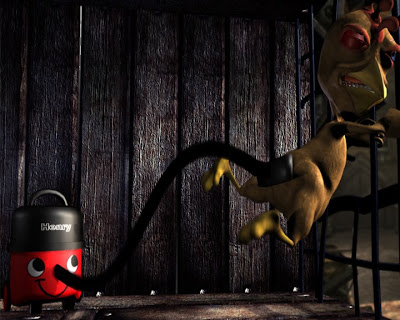

And this is the rough composite - The wood will need some colour adjustment and I think the character is casting too much shadow. I will come back to this shot once I've finished some other bits so I can come back to this with fresh eyes

Sunday, 8 June 2008
well...

I have just been working on lighting for all the shots in the film and also finishing off the little bits of animation here and there. The picture above is of what I am currently working on. I will later work on the lighting for the background plate for the shot
Saturday, 7 June 2008
Chicken laying eggs
I have finally finished animating this shot where the generic looking chicken lays a few eggs. It is very simple animation and I tried to make the sequence quite funny
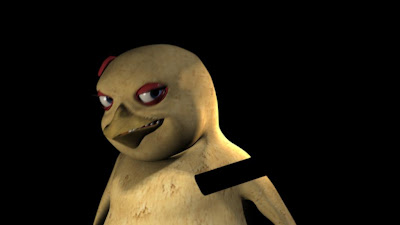
Also today I have created a new lighting rig for our character separately. The way I was doing this before was to just make all the lights in the scene and link which light specifically affects the character, the bg etc....but now I have actually just made a lighting rig specifically for the main chicken so then i can copy this rig and import it into the other shots. This is the result of my new lighting rig for the character:
I am very pleased with the result, to achieve this I used different types of lights to do different things. I used point lights for sharp shadows, a spot light for a dappled soft shadow and i used ambient lights with the shade turned down to zero to brighten up and de-saturate the shadows to give the impression that light is bouncing from the environment.
Also today I have created a new lighting rig for our character separately. The way I was doing this before was to just make all the lights in the scene and link which light specifically affects the character, the bg etc....but now I have actually just made a lighting rig specifically for the main chicken so then i can copy this rig and import it into the other shots. This is the result of my new lighting rig for the character:

I am very pleased with the result, to achieve this I used different types of lights to do different things. I used point lights for sharp shadows, a spot light for a dappled soft shadow and i used ambient lights with the shade turned down to zero to brighten up and de-saturate the shadows to give the impression that light is bouncing from the environment.
Friday, 6 June 2008
shadow shot update
This is what I have been working on for the transformation shot. This will be a silhouette projected onto the back wall:
Like I said this shot is supposed to be a silhouette of our character transforming. In order for it to work I had to break apart the coop and position a directed spot light in the right place.
It was quite hard arranging it to be just right so the shadow on the wall wasnt too long and cutting off our character's head. Also I assigned a background shader to the coop so it doesnt render out but can receive shadows. I have given my file to Luke so that he can do the secondary on the shot while I move onto the next shot. In the meantime I have done a rough composite of how the scene should look with the shadows and coop background plate:
(that bit at the end was a cockadoodle doo)
Like I said this shot is supposed to be a silhouette of our character transforming. In order for it to work I had to break apart the coop and position a directed spot light in the right place.

It was quite hard arranging it to be just right so the shadow on the wall wasnt too long and cutting off our character's head. Also I assigned a background shader to the coop so it doesnt render out but can receive shadows. I have given my file to Luke so that he can do the secondary on the shot while I move onto the next shot. In the meantime I have done a rough composite of how the scene should look with the shadows and coop background plate:
(that bit at the end was a cockadoodle doo)
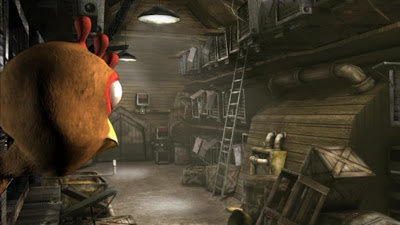
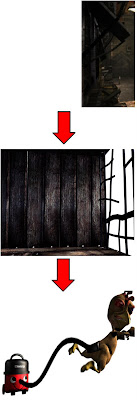
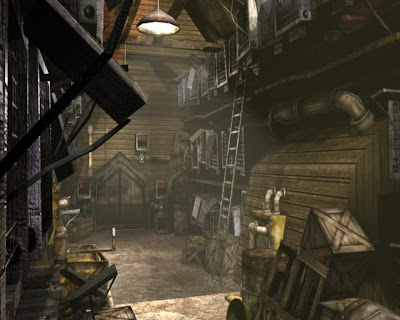
Lighting barn interior
This is the result of a LONG time lighting this scene - I think it has turned out quite nicely as an establishing shot of our barn. When I began with lighting this scene I had all sorts of problems such as textures and even geometry just vanishing when trying to render. Some of this was due to particles in the fog interfering with depth maps and such. In the end I managed to clear all this up and feel that this has been the most challenging part of the whole film for me so far.
Thursday, 5 June 2008
Animation
Over the past few days these are the animations I have been working on. They were relatively simple cut-aways of our chicken looking at the other chicken flirting and then his reaction:
Tuesday, 3 June 2008
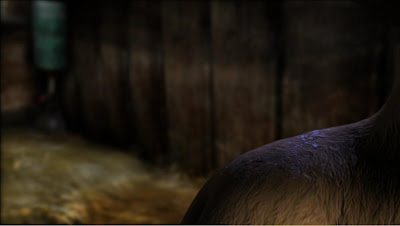
Boiler lighting
The boiler in our film (modelled and textured by Rey) was designed to look menacing so I have tried to emphasise this with my lighting of it. This was one of my early attempts of lighting the boiler portion of the barn:
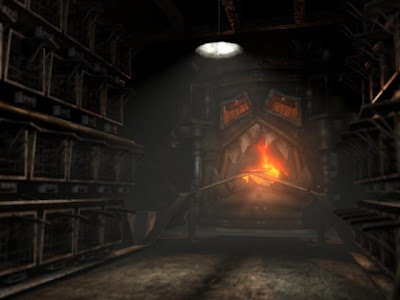
I liked how the fire came out but everything still looked very dead. This is what I have done to it now:
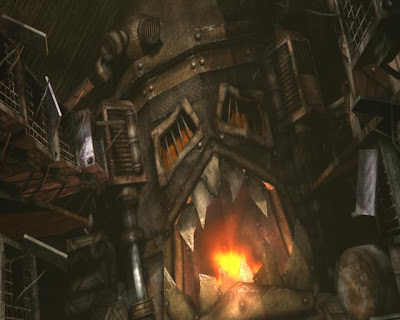
I have added much more light and made sure that the shadows still sit in the little corners. This was rendered without an occlusion pass - if we have enough time I may add one but I am liking how it looks at the moment.
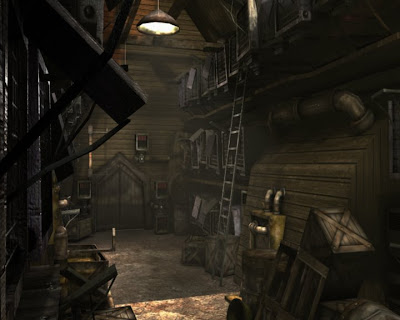
Inside coop lighting
From the introduction shot of our character where he pops his out out from his coop I have decided to slightly change what is behind him. I have pushed back the rear wall of Rey's barn to add more depth to the shot. I have been working on lighting the entire interior of the barn:
As I mentioned in the post earlier this is also going to be a background plate. This means that it will only need to be rendered once and the best part is that we can manipulate this frame to however we want in photoshop. The picture below is of the plate when I added a layer of occlusion and other slight tweaks in photoshop to make the image fit the scene better.

As I mentioned in the post earlier this is also going to be a background plate. This means that it will only need to be rendered once and the best part is that we can manipulate this frame to however we want in photoshop. The picture below is of the plate when I added a layer of occlusion and other slight tweaks in photoshop to make the image fit the scene better.

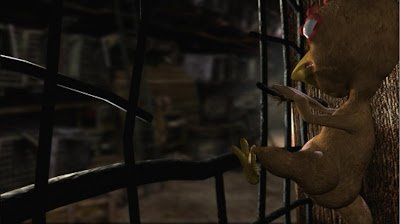
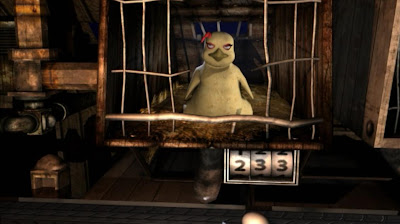
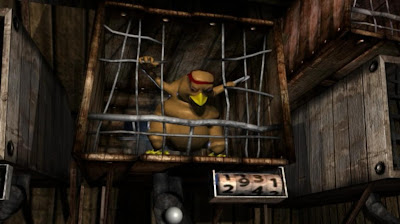
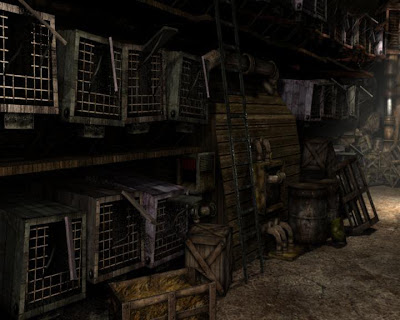
Compositing
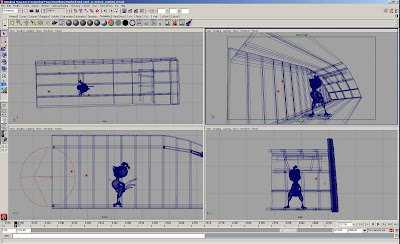
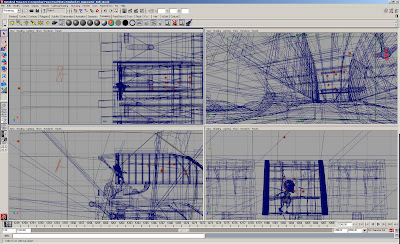
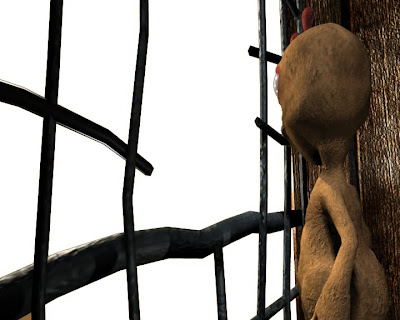
For this shot I we are having our character pulling off a bar from his coop. In the background of this shot you will see the rest of the inside of the barn so I decided instead of rendering out this background every time I will make a background plate which we render one and composite our character and bars ontop of that - this should save alot of rendering time but came with a few of it's own problems. This is a render of the background plate I have done with a rough lighting setup:
and below is a still of our character in his coop
when i composited the two shots together i got this:
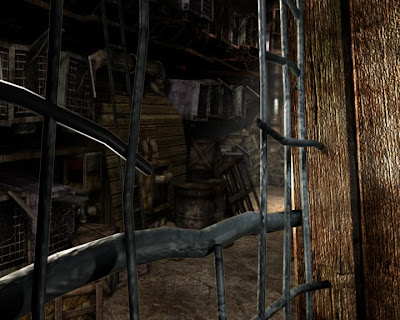
if you look closely you can see that there is a distinct dark edge to where the two composites meet on the bars.
This is not good! I was looking around and found this button in photoshop -very useful indeed!
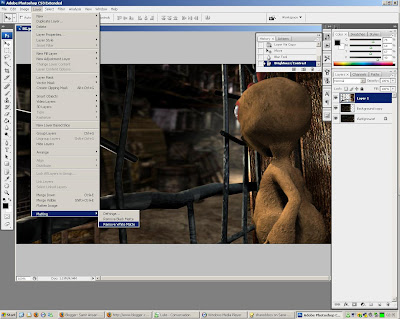
now that line is gawn!
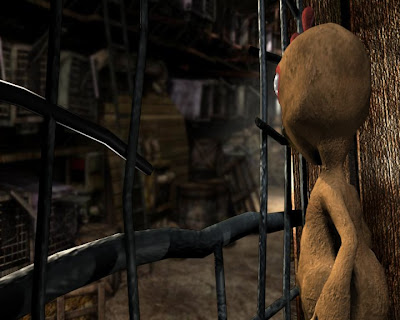

and below is a still of our character in his coop

when i composited the two shots together i got this:

if you look closely you can see that there is a distinct dark edge to where the two composites meet on the bars.
This is not good! I was looking around and found this button in photoshop -very useful indeed!

now that line is gawn!

corrections to the lighting of the Stamp Collector scene
I showed Andrew my lighting setup for the interior in his film and he really liked it. His ownly feedback was that he wanted the corners of the walls to be darker. Originally I didnt want to add an occlusion pass to the scene because he told me he was concerned with render times, but after talking about it again he said he wants me to add that pass. This was the result:
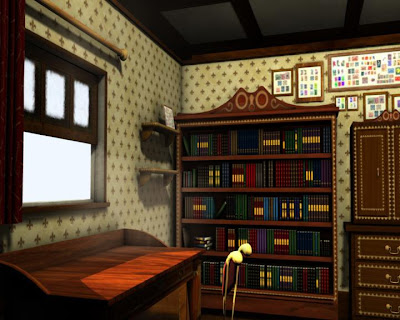
Andrew liked this but said that he wanted the top corners to be much darker than they currently are. I was having problems with making them darker because I had to delete the roof so that the occlusion in the ambient occlusion pass could enter the room and not leave me with a black image. Instead I then tried to delete a back wall instead of the roof but i still wasnt getting very dark top corners because of the light pouring in from the window. I felt I had to resort to a more un-orthodox method, I decided to make 2 large planes and got them to intersect the top corners of the walls. I then lowered the opacity on these so that they would cast a shadow:

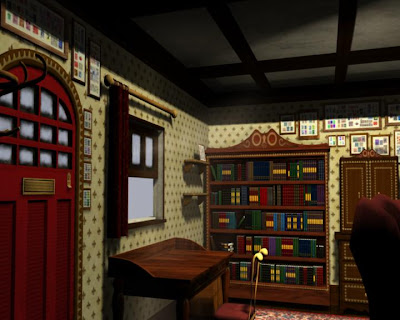
This left VERY heavy shadows. I tried to make the material of the intersecting planes a ramp shader going from black to white (making the transparency systematically get more opaque as it gets to black) but because I was using depth map shadows this did not work. In the end Andrew told me that the room wont even be seen from this angle so it irradicates the problem straight away!!! but still I learned something today :P
Subscribe to:
Posts (Atom)